
Upcycling
10 Creative Upcycling Projects for Transforming Old Furniture
Upcycling is the process of transforming something old into something new. It’s an environmentally friendly way to reuse materials, and it can also be a fun way to add some personality to your home decor.
When you think about upcycling furniture, you might imagine taking an old chair or table and turning it into something completely different–like a bench or dining table. But there are so many other ways that you can use upcycled materials! In this article we’ll go over 10 creative projects for transforming old furniture into new pieces that will look great in any room of your home.
Repurposing Furniture
You can donate or sell your old furniture, or you can repurpose its parts. There are many creative ways to make use of an old piece of furniture, such as turning it into a planter or using it as a bench for outdoor use.
If you’re looking for ideas on how to upcycle your old furniture, here are some projects that may inspire you:
- Dresser-to-Bench Conversion: Take an old dresser, remove the drawers, and add a cushioned seat to create a unique and comfortable bench with built-in storage.
- Suitcase Side Table: Stack vintage suitcases and secure them together to create a quirky side table with built-in storage for books, magazines, or other items.
- Chair Planter: Turn an old wooden chair into a beautiful planter by removing the seat and adding a container or basket filled with your favorite plants.
- Pallet Coffee Table: Transform wooden pallets into a rustic coffee table by adding casters for easy movement and a glass top for a smooth surface.
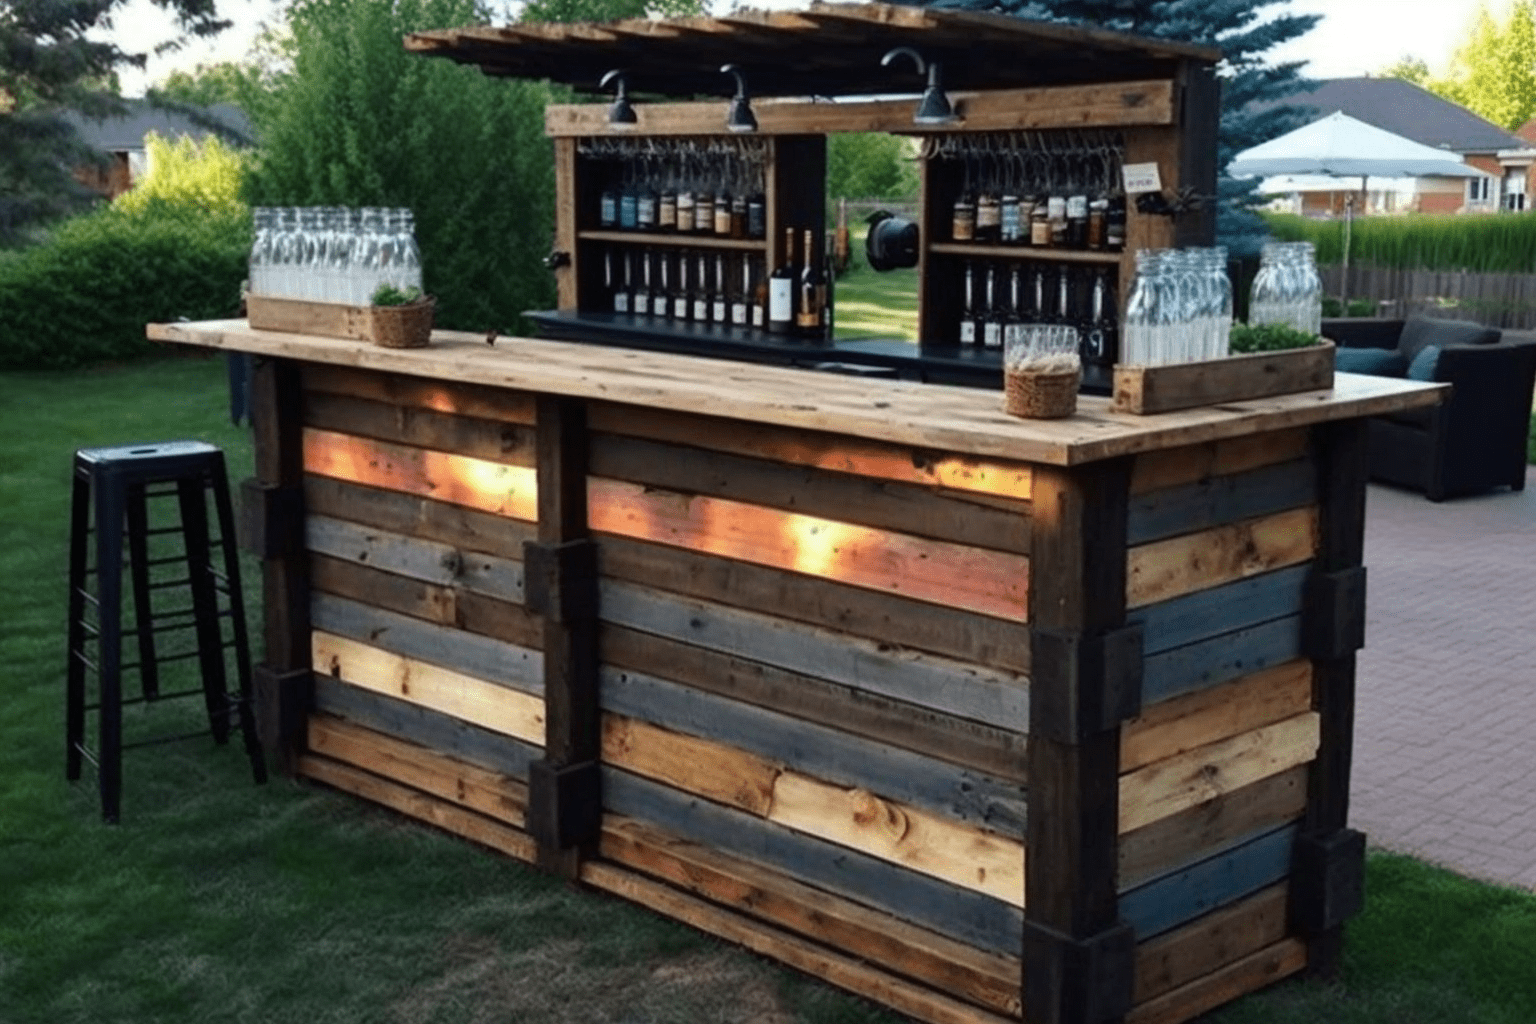
- Bookshelf Bar Cart: Convert a bookshelf into a stylish bar cart by adding wheels and repurposing the shelves to hold bottles, glassware, and other bar essentials.
- Headboard Coat Rack: Repurpose an old headboard into a functional coat rack by adding hooks and painting it to match your home’s décor.
- Door-turned-Dining Table: Use an old door as the tabletop for a dining table by attaching it to a sturdy base and adding a glass top for a smooth surface.
- Window Frame Wall Art: Turn old window frames into unique wall art by painting them and adding decorations like vintage photos, pressed flowers, or small mirrors.
- Shutter Magazine Rack: Attach repurposed shutters to the wall to create a vintage-inspired magazine rack for your living room or office.
- Old Crib into a Desk: If you have an old crib that your child has outgrown, remove one side and add a wooden or glass top to create a unique and functional desk space.
Choosing the Right Project
Choosing the right project is an important part of upcycling. The first thing to do is assess your furniture, and then choose a project that fits your skill level. If you’re new to DIY, try starting with something simple like painting or staining. For more ambitious projects, research upcycling techniques before diving in so that you know what to expect from each step along the way.
Gathering Materials
- The first step to any good DIY project is gathering the right tools and materials. You’ll want to make sure you have a few things on hand before getting started:
- Paint or fabric
- A brush or roller for applying paint or fabric (depending on what you choose)
- Scissors for cutting out pieces of fabric or trimming excess wood from your furniture piece, if necessary.
Once you have these items in hand, it’s time to decide whether or not this project will cost more than it’s worth. If so, consider skipping it–or at least waiting until later when money isn’t quite so tight!
Prepping the Furniture
Before you get started, there are a few things to consider. First, make sure the piece of furniture is clean and free of any dirt or grime. You can use a damp cloth to wipe it down if necessary. If there are any scratches or dents in the wood, they should be repaired as well. If this isn’t possible (or if you don’t feel comfortable doing it yourself), take the piece to a professional for repair work before painting or staining it so that these imperfections won’t show through later on.
Next comes sanding–a crucial step in preparing your furniture for painting or staining! Sanding removes old varnish and other finishes from pieces of furniture so that fresh coats will stick better when applied later on; it also gives them an even surface texture that will help prevent peeling when finished products come into contact with each other over time (for example: if you have painted legs but unfinished tops). You can use either fine-grit sandpaper (#120) or medium-grit (#180) depending on how smooth/roughly textured you’d like your end result look like – just remember not too much pressure when using either one since too much pressure could damage underlying materials like wood grains themselves which could cause cracks during drying periods later down line…
Painting and Staining
Painting and staining are among the most popular ways to give old furniture a new look. However, there’s more to it than just choosing the right paint or stain color. You also need to consider whether you want to apply a primer first, which can help prevent peeling and cracking in the future. Then comes applying your chosen finish: whether by brush or roller (or both), this step requires patience and care so as not to end up with drips or streaks on your piece of furniture!
Adding Decorative Touches
- Adding fabric. If you’re looking to add some color and texture to your piece, try adding some fabric! This is a great way to make a boring piece of furniture look more interesting and unique. You can sew pieces of fabric onto the surface or use it as an accent pillow or blanket on top of another piece of furniture such as an armchair or couch.
- Stencils and decoupage. Another way to give your furniture some personality is through stenciling or decoupaging old pieces with new designs using things like paper cutouts, colored tape, paint brushes and other materials like glitter glue that will add even more sparkle when applied over top (but be careful not too much weight!).
Finishing Touches
After you’ve finished your project, it’s a good idea to seal the wood with some kind of protective finish. This will help prevent moisture from entering into the wood and causing damage. You can use anything from polyurethane to linseed oil (which is what I used).
If you want to add a little extra shine and protection for your piece, waxing or varnishing are both good options. Waxing is easier but doesn’t last as long; varnish requires more work but lasts much longer. If neither of these sounds appealing to you, another option is adding felt pads or bumpers on corners where they might get knocked around often–this will help prevent any damage from occurring!
Conclusion
The upcycling process is a great way to help the environment, while also creating something new and unique. It’s an opportunity to make something out of nothing, which is satisfying in its own right.
If you’re looking for inspiration on how to repurpose old furniture or create something new from scratch, look no further than this list of 10 creative upcycling projects!
